How to create a work area
NOTE : If you setup any work areas your customers will be unable to book you outside of your work areas. For this reason, we recommend only using work areas if :-
- You have staff that have different geographical areas they work in (different cities or some work the north side and some work the south etc). This could also imply only supporting some services in some areas (based on what staff perform them)
- You charge travel fees for different geographical areas
- You want to block ordering say Drone Photography near an airport
- You want to split your available times up geographically (e.g. working the east side Mon-Wed, the west Friday and all areas on Thursday).
As a supplier, you can always override your own restrictions. Staff not in the work area for a booking will be selectable but show with a warning (not in work).
Go to Setup > Work Areas on your dashboard
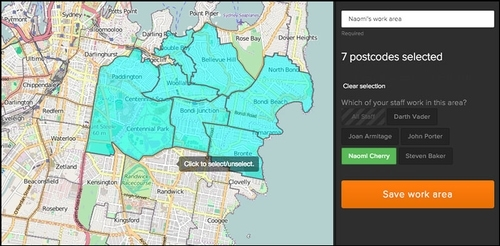
- Enter a name for the work area in the empty field at the top right.
- Select which staff members will be working in this area.
- Select the colour you'd like the work area to display as.
- Select which postcodes are to be included in the work area. There are various methods available for selecting postcodes - use the tools at the top left of the map to change between drawing a polygon, circle, square or clicking on each postcode.
- If you need to de-select a postcode simply click on the green plus icon and it will turn to a red minus, you can then click on the postcode you need to de-select.
 6. Save the work area.